In-depth Next.js guides covering App Router, RSC, ISR, and deployment. Get code examples, optimization checklists, and prompts to accelerate development.
Recently, I was deep into building a headless e-commerce shop with Shopify. Everything was modern and lightning-fast, but then I hit a common wall: cookie consent. I needed to keep my store GDPR-compliant, but all the hosted solutions I found wanted a monthly subscription. Instead of adding another bill, I decided to build my own cookie consent system in Next.js.
During this project, I learned a big lesson: you can solve cookie consent in two ways—on the server or on the client. Each comes with trade-offs. Below, I’ll show you both, so you can choose the one that fits your project best. In the end, you’ll have a full-featured solution: a customizable banner, advanced options, and a way for users to edit preferences anytime.
Why Cookie Consent Matters
If you use analytics, ads, or tracking of any kind, laws like GDPR and CCPA require you to get explicit user consent. That means you should not load non-essential scripts (for example, Google Analytics or Tag Manager) until the user accepts. A good consent system also lets users change their minds later.
Two Approaches
Server-side: Cookie reading and logic runs on every request. Easy to start, but disables static rendering.
Client-side: Cookie logic happens in the browser. Supports static generation and better performance, but is a bit trickier.
1. Server-Side Cookie Consent (Simple but Dynamic)
This approach is easy to grasp. It reads the consent cookie on the server, before rendering your page. That means you can instantly show or hide analytics and the consent banner. There’s just one catch: this makes your entire app rendered dynamically. Static optimization is lost. If you’re fine with that—this is for you.
First, we create a config file that holds the names, version, and settings used for our cookie consent. This gives us a single place to update all consent-related constants later, like expiration length or the cookie’s structure.
Sets the name, expiration, and version for your consent cookie.
Defines the default consent state when a new user arrives.
This config will be imported by all other files to keep everything in sync.
Step 2: Read and Validate Consent on the Server
Next, we build utility functions that let us check and validate the consent cookie from server-side code. This includes getting the value, checking expiration, and knowing whether to show analytics or the cookie banner.
Returns the consent state or null if missing/broken/expired.
Makes it easy to decide whether to show analytics or the consent banner before page render.
Step 3: Server Actions to Save Consent
We need backend handlers to actually store consent choices. These "actions" set the cookie and define different scenarios: accept all, reject all, or save a custom choice. They will be called from the UI.
Each function sets the consent cookie with the selected options.
By using separate functions, it’s simple to wire into three buttons: Accept All, Reject All, or use a custom choice.
This makes it easy to call the right logic from the frontend when needed.
Step 4: Server-Side Banner Controller
The banner controller decides whether to render the cookie consent banner before the page is hydrated. Placing this logic server-side means it will show or not show the banner without flashing on screen.
Checks on the server if the consent banner should be visible on page load.
Renders <CookieBanner showBanner={...} /> with the correct prop.
Helps avoid showing the banner after hydration if not needed.
Step 5: Cookie Banner Component
Now we build the actual consent banner. This shows three buttons. It will trigger the server actions you made before. This component is a client component so it can use hooks and handle user clicks.
typescript
// components/cookie-consent/cookie-banner.tsx"use client";
import { useState, useTransition } from"react";
import { acceptAllCookies, rejectAllCookies } from"@/actions/cookie-consent";
import { CookieSettings } from"./cookie-settings";
exportfunctionCookieBanner({ showBanner }) {
const [showSettings, setShowSettings] = useState(false);
const [isPending, startTransition] = useTransition();
if (!showBanner) returnnull;
consthandleAcceptAll = () => {
startTransition(async () => {
awaitacceptAllCookies();
window.location.reload();
});
};
consthandleRejectAll = () => {
startTransition(async () => {
awaitrejectAllCookies();
window.location.reload();
});
};
if (showSettings) {
return (
<CookieSettingsonBack={() => setShowSettings(false)}
onClose={() => setShowSettings(false)}
/>
);
}
return (
<div><div><p>
We use cookies for basic functionality and analytics. You can accept all, reject all, or customize your choices.
</p><buttononClick={handleAcceptAll}disabled={isPending}>Accept All</button><buttononClick={handleRejectAll}disabled={isPending}>Reject All</button><buttononClick={() => setShowSettings(true)} disabled={isPending}>Cookie Settings</button></div></div>
);
}
What this does:
Shows the consent banner only if it needs to be shown.
Provides three choices: Accept All, Reject All, or open settings.
Uses React hooks for UI state and transitions.
Clicking a button runs the server action and reloads to update the app.
Step 6: Google Analytics Consent Component
For GDPR, you can’t load Google Analytics unless the user gave explicit consent. This component only inserts the analytics script if consent has been given.
Loads Google Analytics only if the user gave permission for analytics cookies.
Uses consent mode to set whether analytics tracking is allowed or denied.
Ensures tracking is GDPR compliant and never runs without consent.
Step 7: Add Banner and Analytics to Layout
At this stage, we need to tie the cookie consent banner and Google Analytics script into our main app layout. We do this in the app/layout.tsx file so the banner and tracking are available on all pages.
First, we check if the user has already consented to analytics cookies on the server. If they have, we load Google Analytics. We always show the cookie banner controller so users can give or change their consent.
typescript
// app/layout.tsximport { BannerController } from"@/components/cookie-consent/banner-controller";
import { GA4Consent } from"@/components/analytics/ga4-consent";
import { shouldShowAnalytics } from"@/lib/cookie-utils";
exportdefaultasyncfunctionRootLayout({ children }) {
// Check consent state on the serverconst hasAnalyticsConsent = awaitshouldShowAnalytics();
return (
<htmllang="en"><body>
{children}
{/* Show cookie consent banner */}
<BannerController />
{/* Load Google Analytics if user accepted analytics cookies */}
{process.env.NEXT_PUBLIC_GA_ID && (
<GA4ConsentgaId={process.env.NEXT_PUBLIC_GA_ID}hasAnalyticsConsent={hasAnalyticsConsent} />
)}
</body></html>
);
}
What this does:
The layout imports the banner controller and the analytics consent component.
It calls shouldShowAnalytics() so we know if analytics scripts should load or not based on user consent.
<BannerController /> decides if banner is visible.
<GA4Consent ... /> runs Google Analytics scripts, but only if the user gave permission.
This setup ensures the consent banner always appears when needed, and analytics tracking is only loaded for users who allow it.
Step 8: Cookie Settings Page
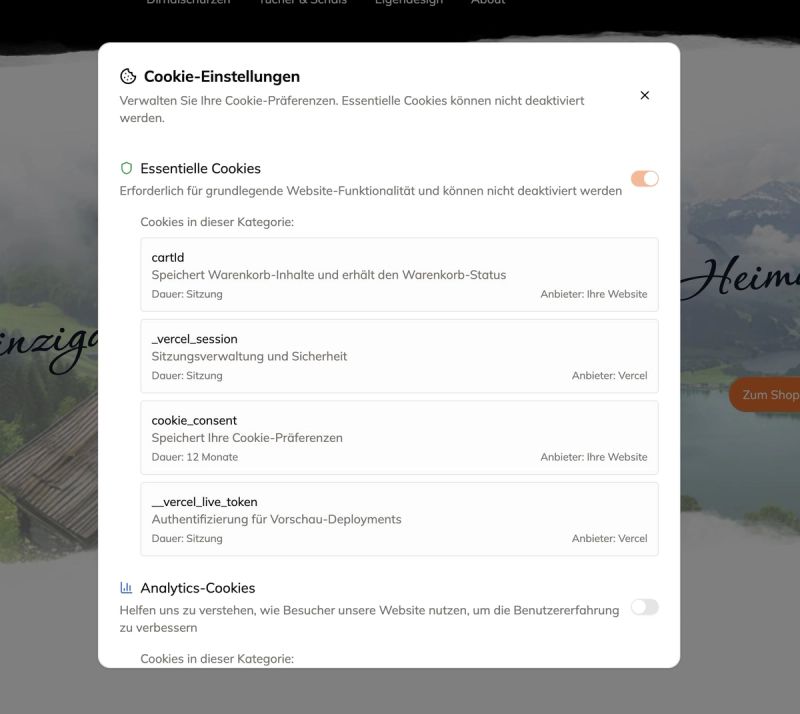
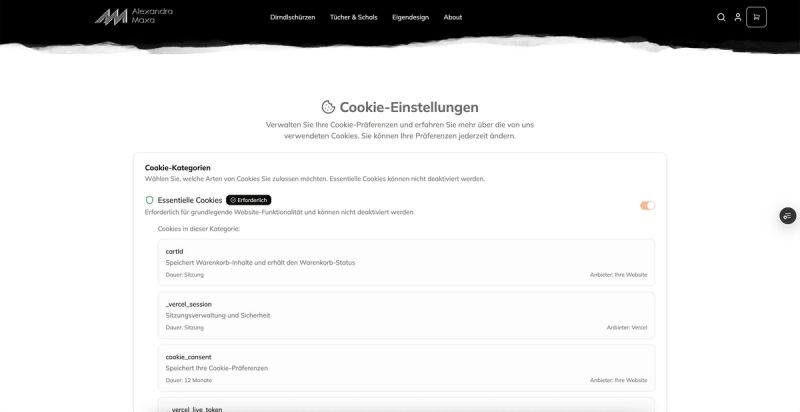
Finally, we make a page where users can review and change their consent at any time. Just link to /cookie-settings from your footer or privacy policy.
Loads the current consent state on the server for this user.
Renders a settings page where visitors can review and update their preferences.
Keeps your app compliant by letting users find consent controls at any time.
2. Client-Side Cookie Consent (Best for Static Sites)
If you want fast static pages and SEO, move all consent logic to the client. This approach is also more scalable for more services.
Step 1: Client-Side Cookie Helpers
First, we make helper functions to manage the consent cookie in the browser. These will read, write, and validate consent without involving the server. By doing this client-side, we can keep our site statically generated and fast.
Provides utility functions to read and write cookie consent in the browser.
Lets you check if consent is still valid, whether to show tracking, and whether to show the banner.
Saves consent as a JSON string in a cookie, and informs the rest of the app when changes happen.
Step 2: Client-Side Banner Controller
Instead of checking consent on the server, we now check on the client using React state and effects. This ensures your app uses static generation (epicreact.dev, react.dev), and shows or hides the banner at the right time.
Renders the banner only when needed, and only after checking the cookie on the client.
Updates banner visibility if consent changes (even in another tab).
Ensures everything runs in the browser, which fits with Next.js's support for Client Components using the "use client" directive (react.dev, tutorialspoint.com).
Step 3: Client-Side Banner and Preferences Component
This is the UI part the user interacts with. Because all consent actions now happen in the browser, this version just calls the client-side helpers. It also allows users to open advanced settings if they want.
typescript
// components/cookie-consent/cookie-banner.tsx"use client";
import { useState } from"react";
import { setCookieConsent } from"@/lib/client-cookie-utils";
import { CookieSettings } from"./cookie-settings";
interfaceCookieBannerProps {
showBanner: boolean;
}
exportfunctionCookieBanner({ showBanner }: CookieBannerProps) {
const [showSettings, setShowSettings] = useState(false);
const [isProcessing, setIsProcessing] = useState(false);
if (!showBanner) returnnull;
consthandleAcceptAll = () => {
setIsProcessing(true);
setCookieConsent({
essential: true,
analytics: true,
consentGiven: true,
});
setIsProcessing(false);
};
consthandleRejectAll = () => {
setIsProcessing(true);
setCookieConsent({
essential: true,
analytics: false,
consentGiven: true,
});
setIsProcessing(false);
};
if (showSettings) {
return (
<CookieSettingsonBack={() => setShowSettings(false)}
onClose={() => setShowSettings(false)}
/>
);
}
return (
<div><div><p>
We use cookies for site functionality and analytics. You can accept all, reject all, or customize preferences.
</p><buttononClick={handleAcceptAll}disabled={isProcessing}>Accept All</button><buttononClick={handleRejectAll}disabled={isProcessing}>Reject All</button><buttononClick={() => setShowSettings(true)} disabled={isProcessing}>Cookie Settings</button></div></div>
);
}
What this does:
Renders a simple cookie consent banner in the browser.
Uses the client-side helper to save the user’s preference to a cookie.
Allows users to open up advanced settings or just make a quick decision.
Step 4: Client-Side Analytics Consent
We need to load analytics scripts only if the user allows it. This component checks consent on the client and updates tracking accordingly.
Loads and configures Google Analytics only if consent is present.
Updates automatically if the user changes their consent (without full reload).
Uses the "use client" directive to work fully browser-side, perfect for Next.js static sites (demystifying-rsc.vercel.app).
Step 5: Add Banner and Analytics to Layout
We now bring everything together in the main app layout. Here, we use only client-side logic so static optimization is preserved.
typescript
// app/layout.tsximport { ReactNode } from"react";
import { BannerController } from"@/components/cookie-consent/banner-controller";
import { GA4Consent } from"@/components/analytics/ga4-consent";
interfaceRootLayoutProps {
children: ReactNode;
}
exportdefaultfunctionRootLayout({ children }: RootLayoutProps) {
// No cookie checks on the server. All logic happens client-side.return (
<htmllang="en"><body>
{children}
{/* Banner checks consent and renders client-side */}
<BannerController />
{/* Analytics will load on client only if allowed */}
{process.env.NEXT_PUBLIC_GA_ID && (
<GA4ConsentgaId={process.env.NEXT_PUBLIC_GA_ID} />
)}
</body></html>
);
}
What this does:
Does not use any server-side calls or checks.
Everything—banner and tracking—runs client-side for optimal static pages and SEO.
Keeps your app fully statically generated, as recommended for performance with Next.js react.dev.
Step 6: Optimized Cookie Settings Page
Users still need to be able to review or change their consent. On the client side, we don’t load consent state on the server; instead, we let the settings component handle it in the browser.
typescript
// app/cookie-settings/page.tsximport { Metadata } from"next";
import { CookieSettingsPage } from"@/components/cookie-consent/cookie-settings-page";
exportconstmetadata: Metadata = {
title: "Cookie Settings",
description: "Manage your cookie preferences",
};
exportdefaultfunctionPage() {
return (
<divclassName="container mx-auto py-8">
{/* Consent state is handled entirely in the client component */}
<CookieSettingsPagecurrentConsent={null} /></div>
);
}
What this does:
Provides a page for users to view and update their preferences at any time.
Leaves all cookie reading/writing to client-side hooks.
Ensures you never lose static generation for your site.
This completes the client-side flow: fully static, SEO-friendly, and easy to maintain. Each step is optimized for Next.js Client Components and supports modern web best practices (react.dev, tutorialspoint.com).
Add a Link to Edit Settings
Users need to be able to change their preferences, so add a /cookie-settings page. Use the CookieSettings component you created earlier.
If you're building a SaaS application, the consent model works differently than a typical website. When users sign up, they've already agreed to your Terms of Service, which means analytics become part of the service contract. What you don't want is to track anonymous visitors on your landing page without asking first. The solution is a hybrid approach: show a consent banner only to visitors, and auto-grant tracking to authenticated users who've already signed the agreement.
This pattern is perfect for products like Notion, Slack, or any multi-tier application with a public landing page (home, pricing, blog) and protected dashboards where users have already consented through signup. You respect visitor privacy on your marketing site while gathering the analytics data you need to improve the product itself.
Implementation: Route-Based Consent
The key is a single component that checks the current route and decides whether to ask for consent or auto-grant it.
Step 1: Create the Route-Aware GA4Consent Component
This component uses usePathname() from next/navigation to detect the user's current route. When the user is on a protected route like /admin, /vozniki, or /superadmin, we treat it as an authenticated session and auto-grant consent since they've already signed the agreement. For public routes, the component waits for the analytics-consent cookie to be set before loading GTM. The dataLayer gets pushed with user_authenticated: true for authenticated users, which you can later use in GA4 to filter and segment your data.
Step 2: Add Consent Banner Only on Landing Page
Your cookie consent banner should only show on the landing page. Create a conditional component:
The banner controller acts as a gatekeeper that checks the current route before deciding whether to render the banner. If the pathname matches a protected route, the component returns nothing—the user is authenticated and has already accepted analytics through your terms. If they're on a public route, the component checks for the analytics-consent cookie and only displays the banner if consent hasn't been recorded yet. This prevents banner fatigue while ensuring every visitor gets a chance to opt in.
Step 3: Update Layout to Include Both Components
Now wire both components into your root layout so they run on every page:
By placing both components at the root layout level, they operate globally across your entire application. The GA4Consent component will check the pathname and either auto-load GTM or wait for consent, while BannerController will show the banner only on public routes. They work in tandem: when a visitor accepts the banner, it triggers the custom event that tells GA4Consent to inject GTM.
Step 4: Consent Banner Component
Keep your banner the same, but now it only appears when needed:
typescript
// components/cookie-consent/cookie-banner.tsx'use client';
import { useState } from'react';
interfaceCookieBannerProps {
showBanner: boolean;
}
exportfunctionCookieBanner({ showBanner }: CookieBannerProps) {
const [isProcessing, setIsProcessing] = useState(false);
if (!showBanner) returnnull;
consthandleAccept = () => {
setIsProcessing(true);
// Set cookie with 1 year expirationdocument.cookie = 'analytics-consent=true; path=/; max-age=31536000; samesite=lax';
// Trigger GTM injectionwindow.dispatchEvent(
newCustomEvent('consent-change', {
detail: { analytics: true }
})
);
setIsProcessing(false);
};
consthandleReject = () => {
setIsProcessing(true);
document.cookie = 'analytics-consent=false; path=/; max-age=31536000; samesite=lax';
setIsProcessing(false);
};
return (
<divclassName="fixed bottom-0 left-0 right-0 bg-white border-t p-4 shadow-lg"><divclassName="max-w-4xl mx-auto flex items-center justify-between gap-4"><pclassName="text-sm text-gray-700">
We use cookies and Google Analytics to understand how you use our site and improve it.
</p><divclassName="flex gap-2"><buttononClick={handleReject}disabled={isProcessing}className="px-4 py-2 text-sm font-medium text-gray-700 border rounded hover:bg-gray-50"
>
Reject
</button><buttononClick={handleAccept}disabled={isProcessing}className="px-4 py-2 text-sm font-medium text-white bg-blue-600 rounded hover:bg-blue-700"
>
Accept
</button></div></div></div>
);
}
When a visitor lands on your homepage, they see the consent banner. If they accept, the analytics-consent cookie is set and a custom event is dispatched, triggering the GA4Consent component to inject GTM. If they navigate to a protected route like /admin after logging in, the BannerController never renders because it detects the protected route. Meanwhile, GA4Consent sees the same protected route and auto-grants consent, loading GTM without requiring the visitor to make another decision.
The result is a seamless experience: visitors get privacy choices on your marketing site, and your product users never see a repetitive banner because they've already agreed through signup. Your analytics flow continuously from both visitor behavior and product usage, with the dataLayer distinguishing between unauthenticated and authenticated sessions.